Hi all.

Whilst going through my stash of just-in-case cards, I found another couple of the cards that I made with the All Dressed Up Framelits.

These 2 cards are very close CASEs of the cards here and here. These are my versions of Cristena and Helen’s cards…..

I love all the dots carried through on the Real Red and white card as well as the dry embossing on the Blushing Bride and Black card……

They really do make a WOW kind of card don’t they??

Just a quick one today as I have been busy playing with some new goodies from the upcoming 2013-14 Catalogue.

Any questions about elements used, Please do not hesitate to ask.

Thanks for popping by.

Lynda xx

Morning all,

For those in Australia, I hope you all had a wonderful Queen’s Birthday long weekend. I hope you all got a little inky and creative.

Last Monday (3rd June) My Miss 8 became Miss 9. We have (endured) her meticulously crossed off  30 day count down to her special day. She is growing into a very cheeky little one (of course totally unaware as to where she acquired that trait from!), hence the inspiration for this ensemble.

I also took a lot of inspiration from Di Barnes with her card here. This is the card I created for her…….

It is a centre step style card. I based it in a tutorial from SCS here but continued all the cuts to the back as well (hope that makes sense?) It stands so nicely…..

 
I coupled her card with a matching box made with the Fancy Favour Box Die (which I LOVE!!!)
 
 
The box was the same front and back and I used the flower motif on the sides to secure the handle.
 
 
Now I can hear you ask….”what is in the wee white bag??” Well, my Bestie Tracey, she makes children’s jewellery. She has an Etsy shop here and you can also find her on Facebook under Berry-licious. Whilst the 2 of us were at Craft Camp this year I asked her to make a special set for Miss 9 and this is what she came up with…….
 
 
Here is the card and box together…….
 
 
Thanks so much for popping by. I am hoping my very first “pre-order” for the new 2013/14 catalogue arrives today or at the latest Thurs. There are SOOOOOOO many delicious things to see and share with you.
 
Stuff used:
CS: (SU) Chocolate Chip, Crumb Cake, Pretty in Pink, Basic Black, Whisper White, Purely Pomegranate (ret), Holiday Treasures DSP (ret), unknown SU Old Olive DSP
Stamps: NONE
Punches: As per Dawn Olchefske’s tute here for the monkey – however I did not have the face punch so I used a Carla Craft CP21 Heart instead and a CP1 heart for the nose, 1 1/4″ Scallop Circle,1″ circle, 7/8″ Scallop Circle, 1/2″ Circle, Boho Blossoms Punch, Carla Craft CP1 Vinca B punch, Memory Box Numbers Die
Ink: (SU) Chocolate Chip SWM for the mouth.
Other Bits: LOTS of Dimensionals, SU Fancy Favour Box Die, Generic yellow Brads
 
Lynda xx


Morning all.

Firstly, thank you all so much for your blog love and encouragement on my return to blogging. It was overwhelming.

Today, I am again combining a couple of projects done over the past couple of months that have a common theme. Today – Punch Art.

As most of you are aware, I was an avid punch artist before I discovered stamping, now I get to combine the two and make some fun creations.

Recently my DH’s niece turned 2. I had seen this card on Andi Potler’s blog and fell in love with it immediately. I had to do it for Pippa!! This is my version……

 
It went up so quickly and it is basically circles!!! It sits up nicely on dimensionals…..and the only Whisper White to be seen is the eyes!!!


Next two cards were done for a customer. They wanted a “girly robot” card for their niece and a “Russian” themed birthday card as they would be in Russia for the wife’s birthday!!! God bless Google!!! This is what I found……

Girly Robot……again seen here on Andi Potler’s blog…..

 
I did change a couple of things on Andi’s punch list, but the majority are the same. The background of the robot is a FAB embossing folder by Cuttlebug called “Clockworks and was so perfect for this card. I also created a small “button” on the melon Mambo strip for a bit of fun. Each layer is separated by a dimensional so it is really squishy to push on.


Something I very rarely (and probably should do more of) is stamp the inside of my cards. The SU Clockworks set provided a good continuing theme for this card.


Lastly…the Babushka’s were inspired by a Deb Fearns card seen here. This is my version of her card….
 
 
I used the punches that Deb listed, with the exception of the hair dos and the lips. The hair was achieved with (fm L – R) The mid portion of the old butterfly punch, the scallop border punch and the base of the heart punch. Here they are close up…


Now the mouth….I like to use everything…..and this is no exception. The mouth is the punch out scrap from the SU Pinking Heart Border Punch. It was PERFECT!!!
 
Thanks again for popping by and tolerating all the photos!! Two posts in a week is a good start to my new regime. It is all baby steps.
 
I am not going to list ALL the supplies used in these cards, but please, if you have any questions, please leave it in the comments and I will answer it for you.
 
Lynda xx
 
 
Hi all!

Please do not adjust your blog readers, yes it is me after nearly a month off the air. Sadly I found that life somewhat overwhelmed me and as usual I took on WAY too much….and finally my body gave way.

I am trying to get use to this whole new Demo thing, manage my family, work, create, play my sport, attended my yearly craft camp and put out all the wee spot fires that us as mothers do!!! My diabetes at the beginning of may did NOT like the way I was living my life and gave me a nasty ultimatum. I had to take notice and as a result I have been slowly getting things back up on track!!

Now….what to share….there is sooooooooooo much….I kid you not!!! I am also hoping to place my first PRE order for the new SU catalogue…so I will have a lot more inky fun to share with you too!!!

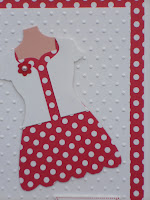
One of the things I got onto a little late was the whole All Dressed Up Framelits. Not being the biggest girly girl…the thought of playing with paper dresses and mannequins was not an up there ambition for me….but I have been proven totally WRONG!!!! I LOVE them and there is sooo much you can do with them!!!

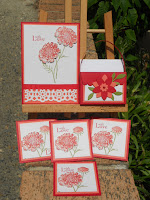
I will share a mix of projects done, although sadly I have not photographed all of the fun!

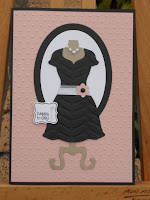
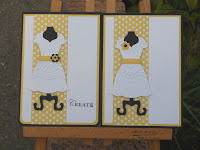
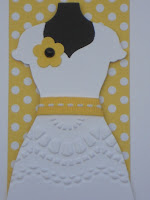
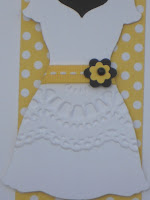
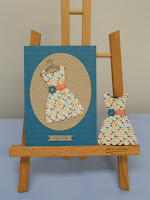
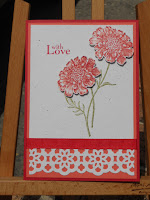
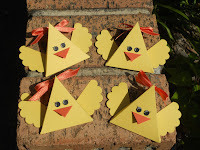
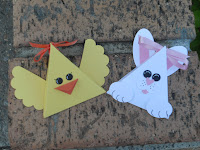
The first card was based on a card I found on Stampin’ Connection. I don’t work with yellow much but found this a lot of fun.

 
On one dress I used the embossed side and on the other I used the debossed side.
 
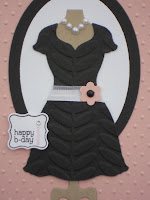
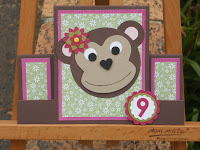
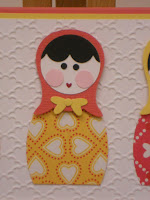
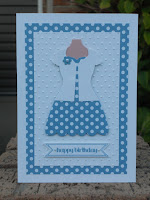
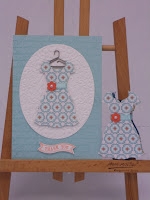
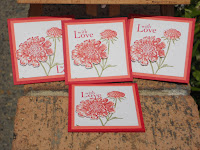
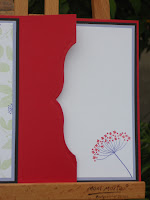
The next one is based on a card I saw by Cristena Bagne here. I actually did it in red first, but did not photograph it. This one is in Marina Mist. Sorry about the dark picture as Sydney had some VERY dodgy weather around this time.
 
 
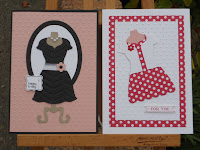
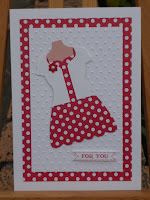
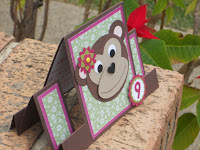
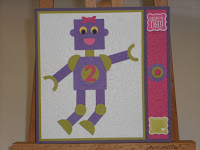
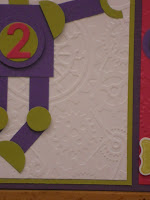
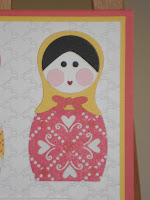
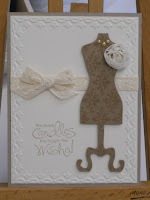
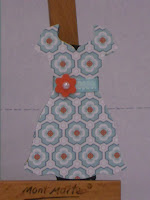
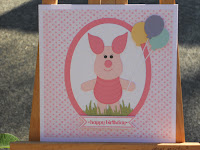
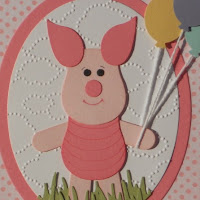
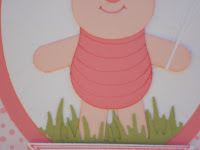
The next one just uses the mannequin from the set and was my very first use with the Natural Composition DSP. Lordy, I do love this paper!! I based it on a card by Niki Toll seen here.
 
 
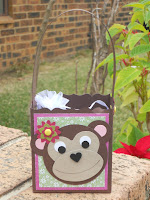
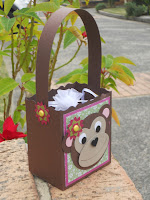
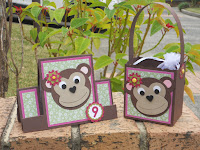
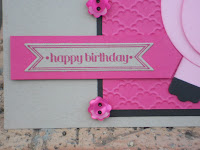
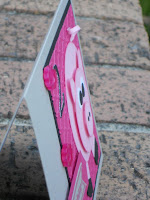
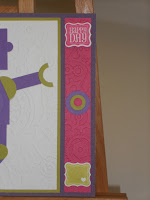
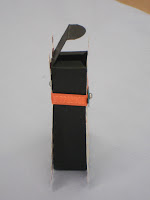
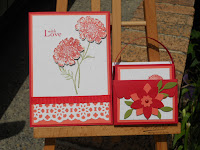
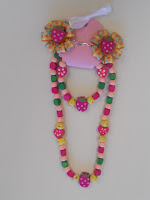
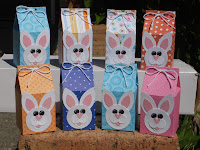
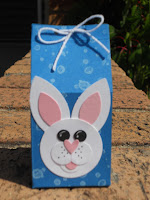
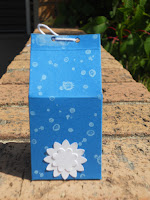
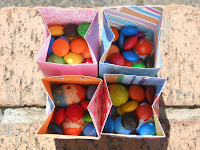
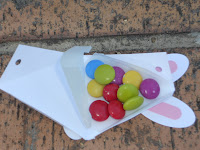
Last but no means least….I got my co-ordinated card/gift thing on and made a little lip balm/lipstick holder for Nicole Derendorf (to say thanks) and Angela Sargeant (for her birthday). Again, the pictures are dodgy and are taken at my workplace, hence the “clinical” backgrounds!!!
 
 
The little holders were from a tutorial by Brenda Quintana here.
 
They are seriously so easy, have a beautiful WOW factor and go up in a flash.
 
Thanks so much for popping by and also for all you patience in my absence. I am going to endeavour to try and get 1-2 posts a week up and also keep you informed as to all the stuff going on in the world of SU.
 
Stuff Used:
CS: (SU) Basic Black, Whisper White, Daffodil Delight,, Blushing Bride, Crumb Cake, Very Vanilla, Island Indigo, Pool Party, Sahara Sand, Tangerine Tango
Ink: SU Stazon, Marina Mist, Crumb Cake, Island Indigo, Tangerine Tango
DSP’s: (SU) Polka Dot DSP, Natural Composition DSP, Sycamore Street DSP (SAB 13)
Stamps: (SU) Loving Thoughts, Itty Bitty Banners, En Francais BGS, Whimsical Words (SAB ’10)
Dies/Embossing Folders: (SU) All dressed up Framelits, Banner Framelits, Oval Framelits, Tulip Frame EF, Holiday Oval EF, Delicate Designs Folders EF, Cuttlebug Swiss Dots EF
Other Bits: SU Flower Trim, Sycamore Street Ribbon (SAB ’13), Carla Craft Corner Rounder Punch
 
Lynda xx
 
 
Hi all.

Today’s creation took inspiration from a card by Ilina Crouse on SCS here. nothing wrong with the card at all, except that it used Calypso Coral……..with RED!!!! Lordy….how to make a gal squirm. Still, there was something that appealed to me about the card, that still to this day eludes me, but on I went. On of the “dancing” Mum’s had a birthday, so I needed something (relatively) quick as a card and gift.

This is what I came up with……..

 
I had to change the ribbon due to none of the calypso stuff, but apart from that it is a direct CASE. I also had the idea of making some matching 3 x 3 note cards in a holder as the gift.


I was pretty wrapped with this result. Here is the holder and card….and then the whole kit and caboodle altogether.


 Thanks for dropping by. I know I have been very slack with posting. Sadly I have had a couple of hiccups with my diabetes and when added to my life in general….the hectic factor is just ridiculous. Know it is my intention to get here more often! Thanks for you patience.
 
Stuff Used:
CS: (SU) Real Red, Calypso Coral, Naturals White, Old Olive
Ink: (SU) Real Red, Calypso Coral, Old Olive
Stamps: (SU) Field Flowers
Punches / Dies: (SU) Lace Ribbon Border Punch, Scallop Dot Border Punch, 5 Petal Flower Punch (ret), Scallop Envelope Die, Sizzlits Little Leaves Die, Boho Blossom Punch
Other Bits: Dimensionals, Double sided tape, Real Red Brad, Non SU Grosgrain Red Ribbon
 
Lynda xx
Hi all,

By now I am guessing most of you out there have heard of the MDS phenomenon. I jumped on board about a month ago and have been experimenting ever since. I am a very tactile crafter in that I love feeling things in my hands, so this whole digital thing was very foreign to me. i am also not that computer savvy…which in its own part proved challenging.

This is the first (and only card and tags) I have done on MDS. I am still getting my head around the fact that I actually found scrapbooking easier on this programme!!!

The card is very bright (again not usually my palate). All DSP’s, embellishments, trims, stamps and sentiments are form the free downloadables in the 30 day trial of MDS.

The tag (again) is very basic, but I DID manage to get a faint snowflake punch as a faint accent in the background.

Thanks for popping by today. Only a quick one as I am wrangling kids on School Holidays and creating MORE before my Free 30 Day trial expires in 5 days. promise to share more soon.

Stuff Used:
SU MDS – click this link here to download it and try it for yourself

Lynda xx

Hi all.

Ever see a card and think I HAVE to do that….and then it takes forever to fin the right occasion to come around??? Well I found such a card…and such an occasion DID come up!!

I was inspired by a couple of Piglet cards here and here. The one on Carla Scraps also came with a very handy tute, so I went from there. My GORJUS niece recently celebrated her 3rd birthday and so this was her card……

I found that everyone I shared this card with smiled, and that is the best thing ever!! I did change a couple of things in Carla’s Tutorial in that I left Piglets Torso a single layer and drew on his “belly”. This was done by centering and tracing around a “scrap” owl punch piece. I also embossed the white oval the with Cloudy Day EF….made such a difference.


The grass is done with the Martha Stewart Grass punch and I added the Itty Bitty Banner for the birthday.


To go with the card, I enclosed an UBER cute beaded bracelet/necklace and hair pin set made by my Bestie – Tracey. She is now selling sets like this and many more through e bay and Facebook under Berry-licious. She even does wee earrings too. They are so perfect for the up and coming young gal about town. Please check out her creations if you have the need for something special and unique foe a little princess.
 
 
Thanks for popping by. I so love reading all your comments and appreciate your taking the time to leave them.
 
Stuff used:
CS: (SU) Whisper White, Regal Rose, Pink Pirouette, Tea Party DSP (ret), Pear Pizzaz, Wisteria Wonder, So Saffron, Pool Party, Basic Black
Ink: (SU) Regal Rose, Pink Pirouette (also sponged on all Piglet pieces), Regal Rose SWM for mouth and belly lines
Stamps: (SU) Itty Bitty Banners
Dies and punches: (SU) Oval Framelits, Banner Framelits, Owl Punch, Bird Punch, Word Window Punch, Martha Stewart grass Punch, Carla Craft CP2 Balloon Punch and 1/8″ circle punch
Other bits: SU Cloudy Day EF, Dimensionals, Double sided tape
 
Lynda xx
 
               
Hi all.

Once again I find myself hanging my head in same at my total SLACKNESS in posting….seriously….where did 2 darn weeks go??? Believe me when I say it is not due of a lack of things to share!!

Today’s creation has a slight twist on it and came about as I was VERY time poor. I had a request to do a card for a 10yo birthday party and that there was an iTune gift card to go with it. Immediately I thought “cool….do one of the Patty Stamps ones” like here. I was then going to do a larger version for the actual card to write in. Sadly this was also around the time of my 1st workshop and also a lot of other commitments. I ran very short of time to complete the 2 projects. The young birthday girl that was to received the card, her fave colours were red, black and purple, so this was my starting point.

So then I thought to myself why not just make the smaller gift card holder BIGGER? So Google got a flogging and no joy. So then I thought “ok….surely it can’t be THAT hard to work out.” I got to work…and this was the result…..

Front


              Inside Front                                                                                                 Inside back


The fun part was getting the slot right in the very middle of the card. In the linked tute Patty uses the Word Window punch, but I wanted to step it up a little. I used one of the labels Framelit dies to assist in getting a very pretty shape. This was the result…..


This is what it looked like when the card was “normal”. I thought it looked really PURDY.
 
 
I guess I should have started out by saying that this card is a standard A5 card (10.5cm x 14.8cm – or 1/2 and A4 sheet of CS.) The red base however was constructed from a 30 x 30cm sheet of CS to get all the folds etc.
 
Thanks for popping by and I hope you like this bigger version of the smaller traditional one. I think I may create some more of these as they are very handy to have and it really is an all in one!!
 
Stuff Used:
CS: (SU) Real Red, Basic Black, Whisper White, Almost Amethyst (ret), non SU glitter CS
Ink: (SU) Real Red, Almost Amethyst (ret), Certainly Celery
Stamps: (SU) Summer Silhouettes, Papillion Potpourri, Birthday Wish (ret)
Dies/Punches: (SU) Labels Collection Framelits, Elegant Butterfly Punch, Wide Oval and Large Oval Punch
Other Bits: Dimensionals, Double Sided Tape, Cuttlebug Olivia Alphabet (for the numbers)
 
Lynda xx
Morning all.

By now, most of you may have heard via the grapevine, other blogs, word of mouth or read it here first…about the digital scrapbooking and card making facility that Stampin’ Up have called My Digital Studio (or MDS).

It’s only $24.95 for the FULL version, which includes $600+ worth of content. You can download a FREE trial version for 30 days.  You have the potential through this software to do so much with it from Digital scrapbooking to cards, birthday invitations, birthday party decorations, Cake toppers, etc,etc,etc…..you are limited by your imagination!!!

MDS gives you the opportunity through their 30 day free trial (check it out here) and if you like what you do with it, then you have the opportunity through discs available in the main Catalogue (page 205) and the new Seasonal Catalogue (pg 5, 30 and 39 – hostess benefits) you can build a creative digital empire.

I have a blog friend – Nicole Derendorf – who is a genius at this kind of thing and has been BEYOND helpful in helping a non techno person like myself using this software. You can check out Nicole’s amazing creations here. Just scroll through he blog and you will find many examples of her cleverness!!

Well….I hope you are all sitting down for the following reveal. I have watched my bestie scrapbook and marvelled at her creations. She has been AT ME for years to get off my backside and give it a go….well I did…..through MDS anyhow. This was my 1st attempt (click on the pic to make it larger)…

Now apparently, after you have “mastered a single page layout, you move onto a double page layout!!! This was the result…..


Now my 2 models are my children (now Miss 8 and Mast 12)….and yes…these pics were taken some time ago indeed.

I had a lot of fun (and more than a couple of bloopers) putting together these pages, but once you have a play….you DO get the hang of it….even if you are nearly computer illiterate like myself!!!

Thanks for popping by. Soooooooooooo much more to share!!

Stuff used:
SU MDS

Lynda xx

Hi all.

Firstly, I wanna wish all my readers all the very best for this Easter period. Here in Sydney we are having a mini Autumn heatwave (again) with temps hitting the high 20’s to low 30’s!!! (68F to 86F for those other than Celsius folk out there).

This year for the first time in a LONG time I am prepared for Easter. I do not buy my kids any eggs because by the time the grandparental bunny, The Aunty/Uncle Bunny and the Neighbour Bunny all make a stop….it gets a little ridiculous!!!! Sometimes to the point that we have Easter chocolate left over in September!!!

We have now 8 children in the villas around us ranging in age from 12-2. With this in mind….and so my 2 wee bunnies can drop their wee surprises off….I made these. They are made from the SU Mini Milk Carton Die (hence the Easter Cow reference!!!)

 
I had to take all the pics quickly as it was very hot in the sun and I did not want the contents to melt!!! Here it is close up at the front…and a small surprise at the back!!!!


The one thing that did surprise me a lot is HOW MUCH chocolate these wee containers hold!!! Check this out…..

 
I also could not forget the Mum’s at dance class. We natter every Thursday whilst our daughters are upstairs learning. I was inspired by the magical tutorial by Julie Davison here. I did change hers up a little in that I used a “punch art” face as opposed to a hand drawn one….I cannot free hand well at all!!!! This is what they received…..
 
 
I did make the bunny too. It holds quite a few Smarties.
 
 
Here are their faces close up……
 
 
Sorry about some of the darker pics. Sometimes the shade was a better option!!!
 
Thanks for popping by and whatever your faith, belief or following, may the coming days provide with you fun, friends and laughter too.
 
Stuff used:
CS: Whisper White, Pretty In Pink, Daffodil Delight, Tangerine Tango, Many retired DSPs in the milk cartons
Ink: Black SWM, White Gel Pen
Punches: Milk Carton Bunny – Head 1 1/4″ circle, Ears – Blossom Builder Punch, Nose – Owl Punch, Muzzle and White Mouth – 1/2″ circle, Pink mouth and eyes – 1/4″ circle, Tail – Boho Blossom Punch
                Triangle Bunny – Face – as per milk carton bunny except the eyes are the MEDIUM circle fm the Owl Punch, Ears – SU Large Oval Punch and Word Window Punch, Paws – SU small oval punch
                Triangle Chick – eyes – 1/4″ circle, SU 2 3/8″ Scallop Circle, Beak – Carla Craft CP2 square Punch
Other Bits: Tangerine Tango ribbon (Sycamore St Bundle fm SAB ’13), Non SU Pink Satin ribbon, White Crochet cotton to tie the milk cartons, COPIOUS amounts of small chocolate!!!!
 
Lynda xx
 
Always prepare before you make a choice. There is so much info about 99bandar at https://99bandar.id